ACS Configuration
Contents:
- Add a Controller
- Add an Expansion Panel
- Configure I/O (Doors)
- Reset Controller
- Push Configuration
- Sync Users
- Doors List
The Access Control System manager can be accessed by clicking the ACS icon in the lower left hand corner of the portal.
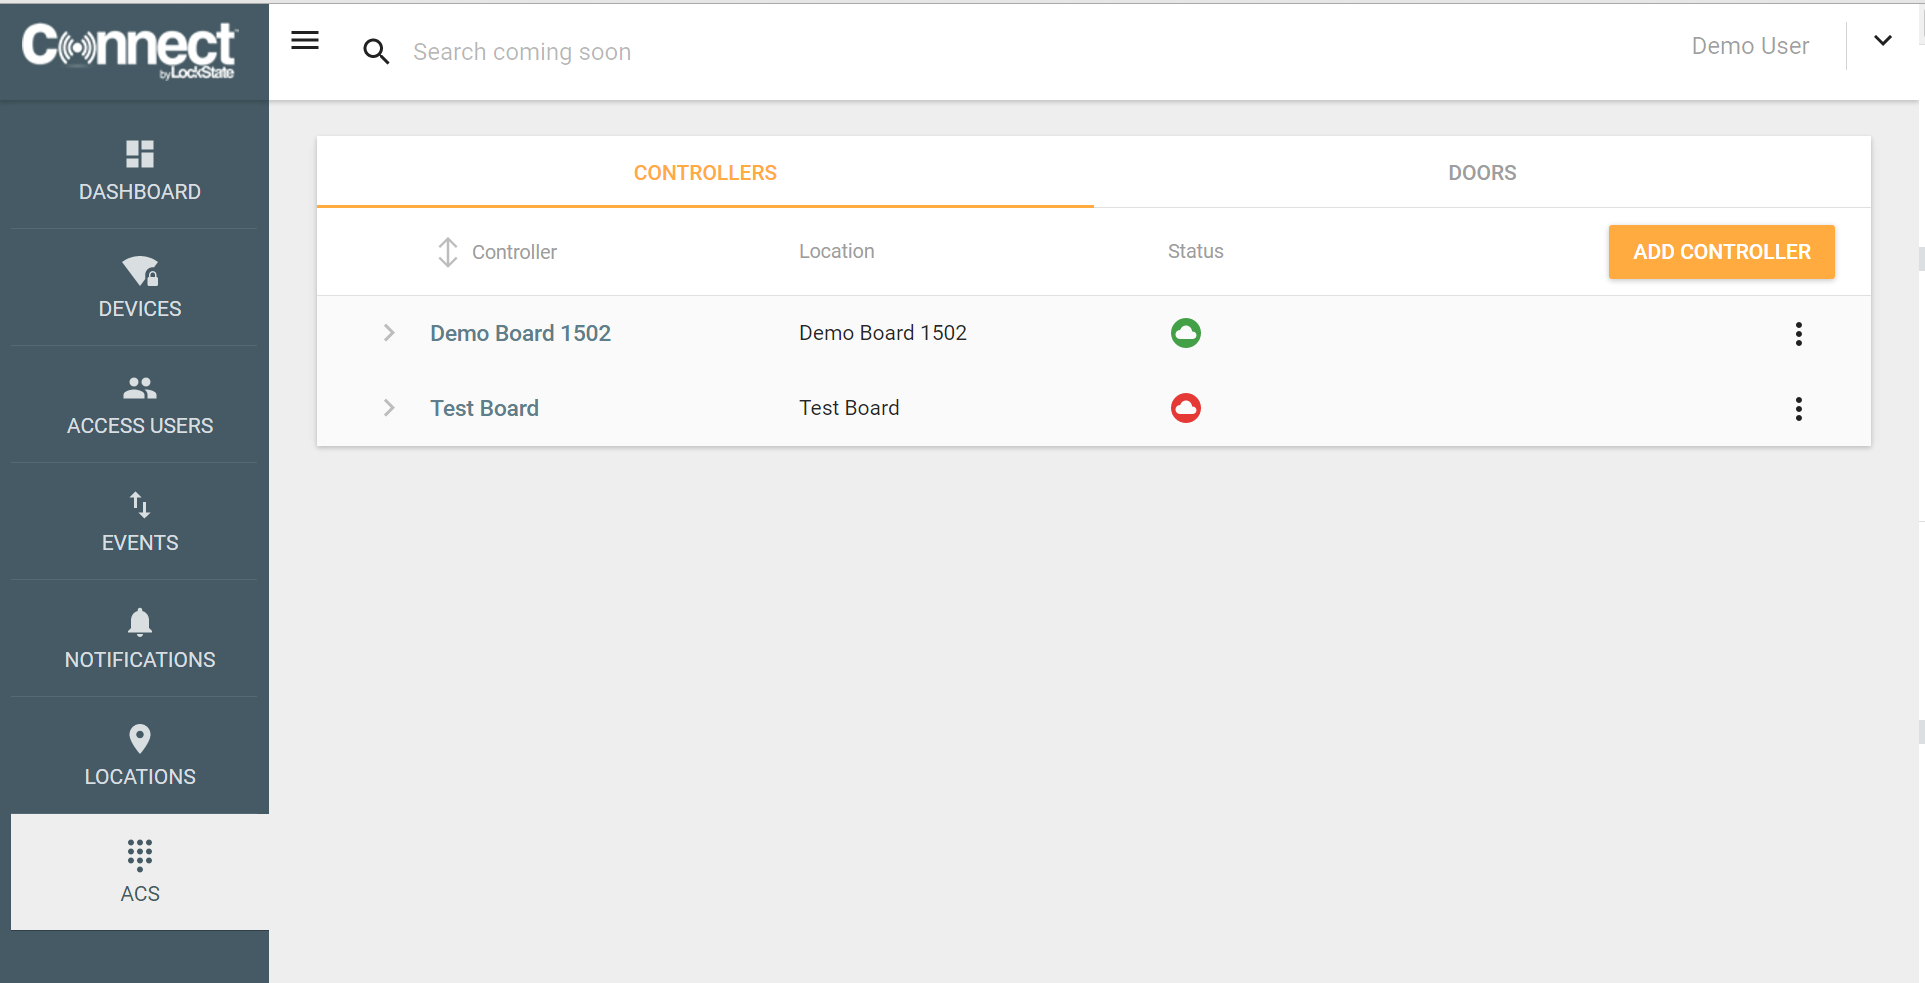
Add a Controller
To add a new master ACS control board click the Add Controller button on the right hand side of the screen.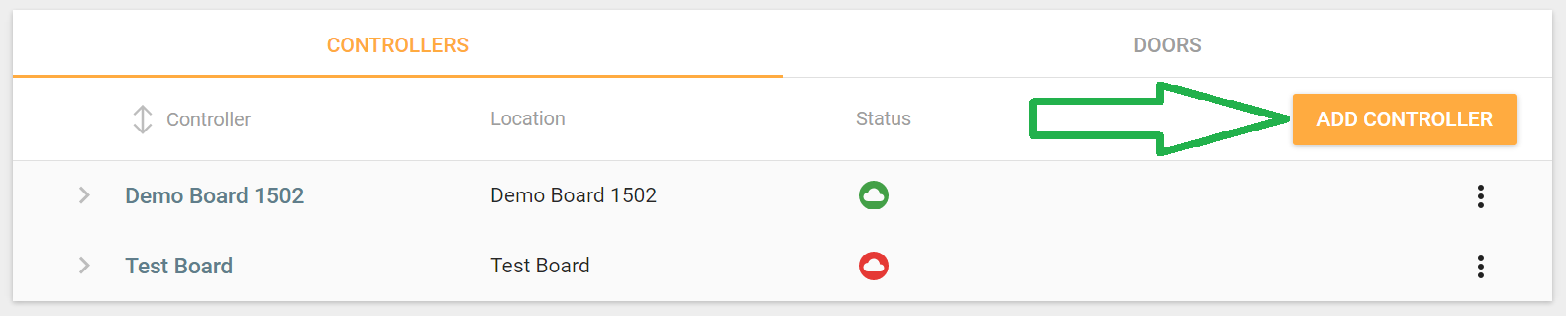
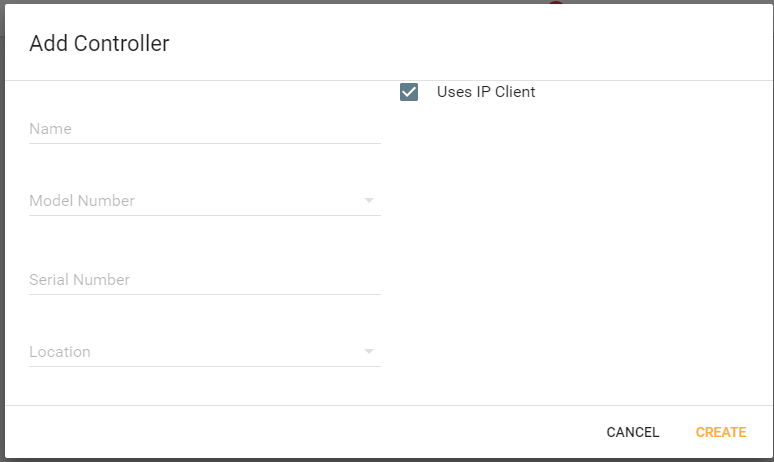
Specify controller name, model number, serial number, and location. It is suggested to leave "Uses IP Client" enabled. This is the default communication method for LockState ACS systems. Disabling this option will reveal the IP server settings menu. Please consult Lockstate technical support before attempting to use IP Server. Once these fields are defined click create below.
Once the controller has been added it will appear in the list with a green status icon if it is properly connected to the internet. If the controller is having trouble connecting to the server or it is offline it will have a red status icon.

Add an Expansion Panel
Click the > to expand tree next to the main board you are adding the expansion to then click the "Add Expansion"

Fill in the required fields then click create. Serial I/O Number and baud rate are defined by jumper or dip switch settings on the expansion board and automatically set to the most common configurations. Serial I/O Number is automatically set by our system based on how many panels are present 9600 baud is default for all lockstate configured controllers consult tech support before using alternate settings. The dip switches on the controller boards are typically set at the factory for easy installation.

Configure I/O
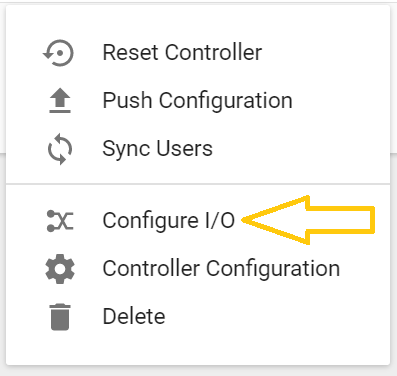
To configure your doors, click the three black dots next to the controller or expansion panel that contains the doors to be created. 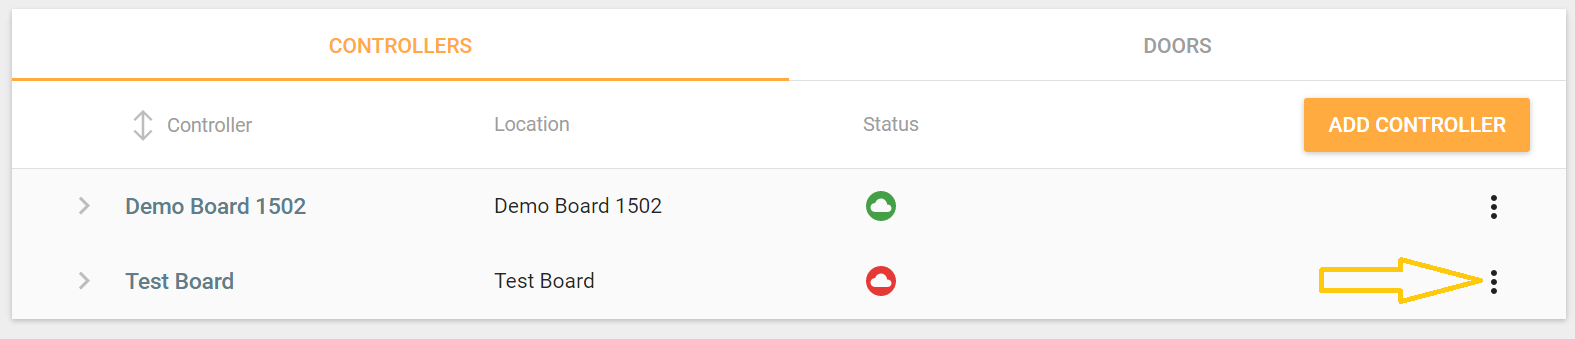 Click the option for "Configure I/O"
When the control board was added earlier 1-2 doors depending on model number were automatically created with a common configuration. This configuration pairs up Reader 1 with Output 1 and Reader 2 with Output 2. If this is not how the system is wired then that can be changed in the next step.

Click the edit pencil show below to edit a doors configuration and name.
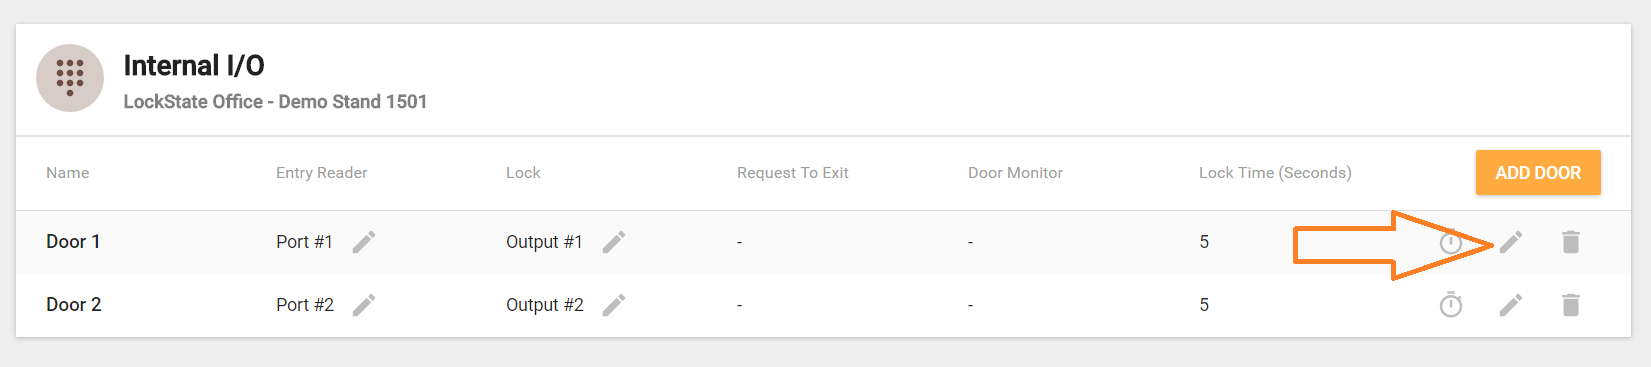
• Fill in the name of the door. • Leave entry reader port as the default unless installation differs from the default. • Lock time is the amount of time the door is unlocked for when a valid credential is entered.• Leave lock output number as default unless install differs from default. • If required assign a lock action schedule.• If a Request to Exit device is wired to a panel input select it in the drop down. • If a door position or door monitor switch is installed on the door select the input to which it is attached. • When finished click create. • These settings will not take effect on a new controller until it has been reset and its configuration has been pushed.

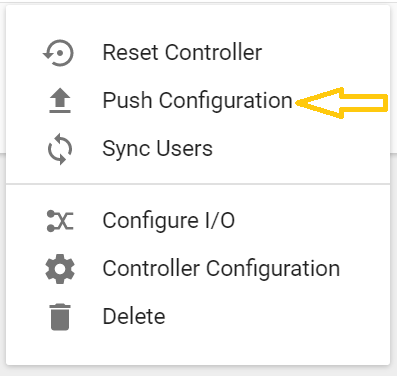
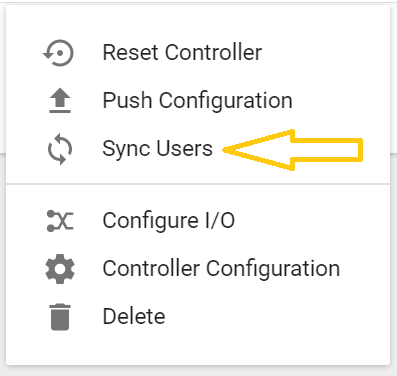
Reset Controller, Push Configuration, and Sync Users
Click the ACS icon in the left hand navigation menu to return to the ACS management menu.
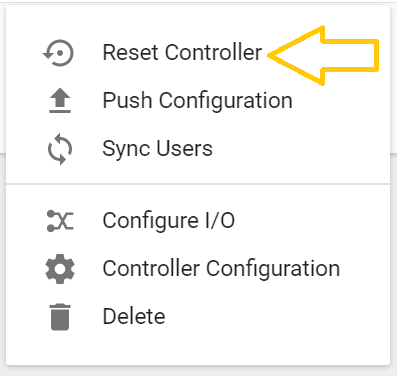
 Then click the three dots to reveal the ACS actions menu for the controller to be reset, configured, or synced.
Reset Controller
When a new controller is added to the system before it can be programmed a "Reset Controller" operation must be performed to clear the memory and make it ready for programming. This must also be done after making changes to an existing configuration before sending the new configuration.
Push Configuration
After a controller has been reset the configuration is wiped and needs to sent to the controller again. Before pushing a configuration be sure to reset the controller. If any changes to the systems basic setup are made a new configuration will need to be pushed before those changes take effect.
Sync Users
After a configuration has been pushed to the controller the systems users will need to be sent to the system by clicking sync users. Under normal circumstances this should not be required as new users will automatically by sent to the system. In the event of a system reset the users will be wiped from memory requiring that they be synced to restore access.
Doors List
From the ACS section of the portal click the "DOORS" tab pictured below to load a list of all ACS doors in the system.
 On the Doors list the locked and unlocked status of each door is indicated by a red or green open padlock icon. Doors can be temporarily unlocked by pressing the temp Unlock button. To permanently unlock or lock a door click the slider switch next to the temp unlock button to the desired position.
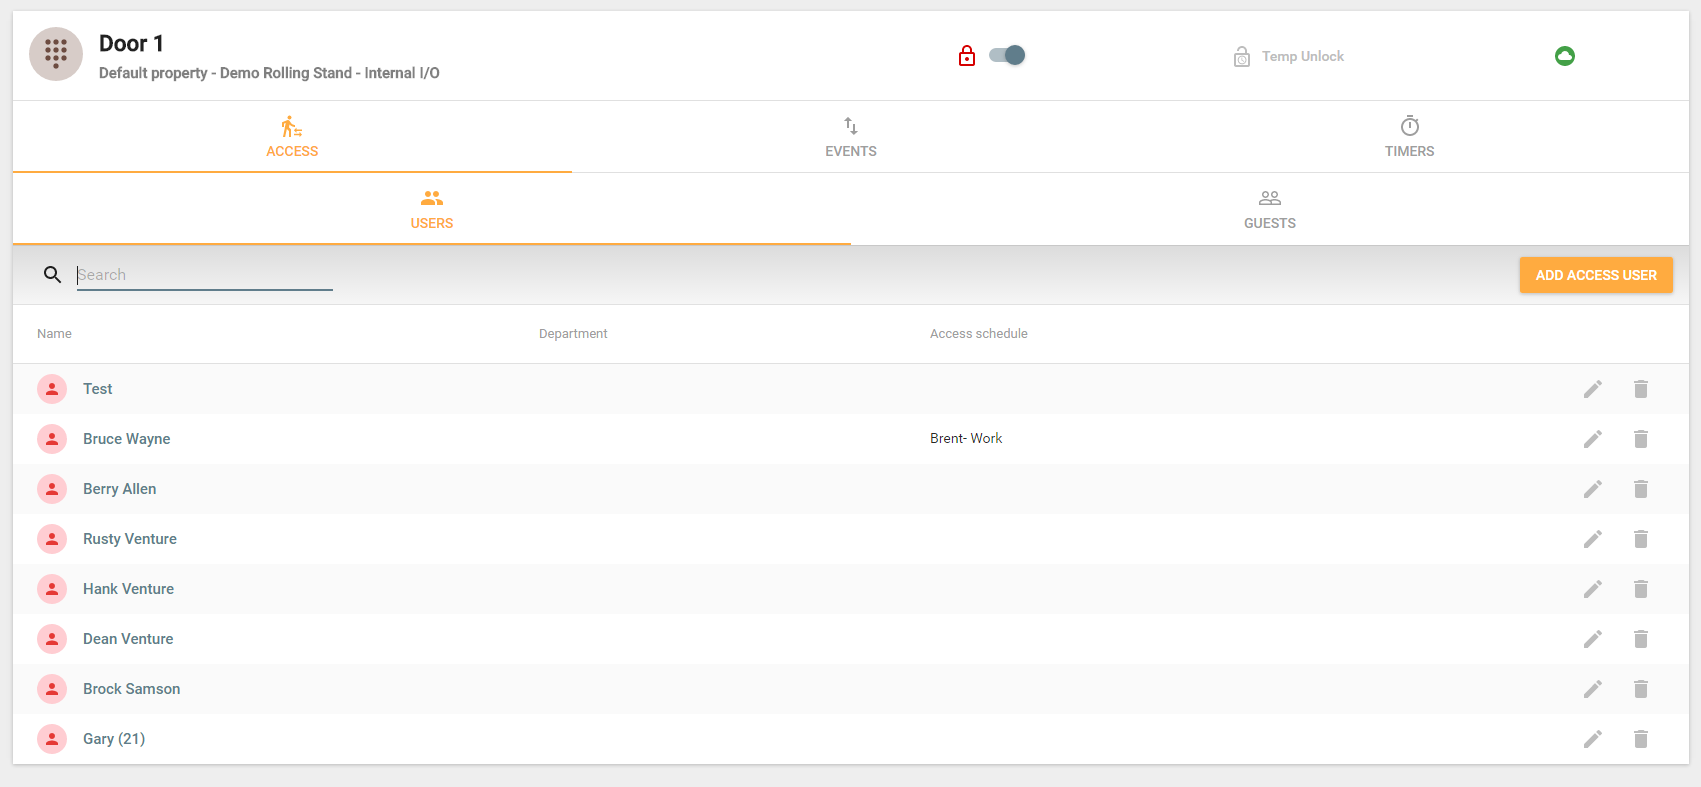
Access Users and Guests
Clicking the three dots then selecting access pictured below will load the user list with access to the door. A new user can be added to this door by clicking the add access user button. Existing users can be edited or deleted using the edit and delete icons to the right of each users name.

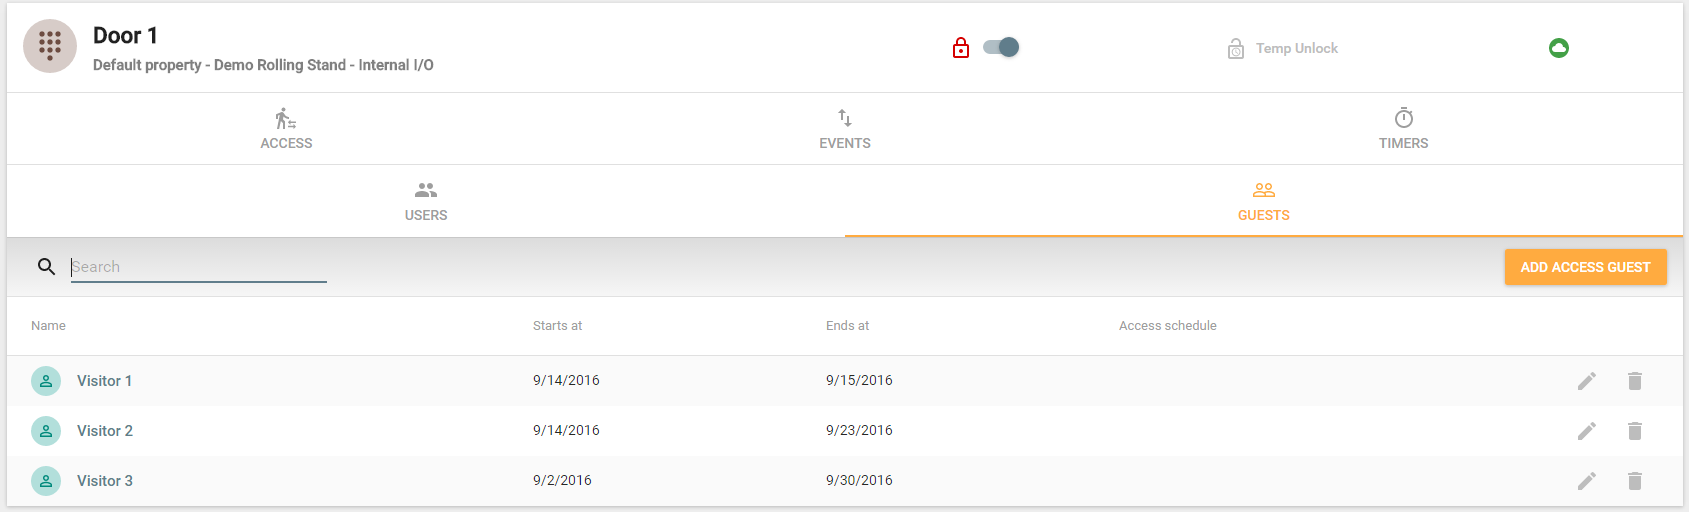
Access Guests with date based access can be viewed by clicking into the Guests tab. A new access guest can be added by clicking the new access guest button.Existing users can be edited or deleted using the edit and delete icons to the right of each users name.
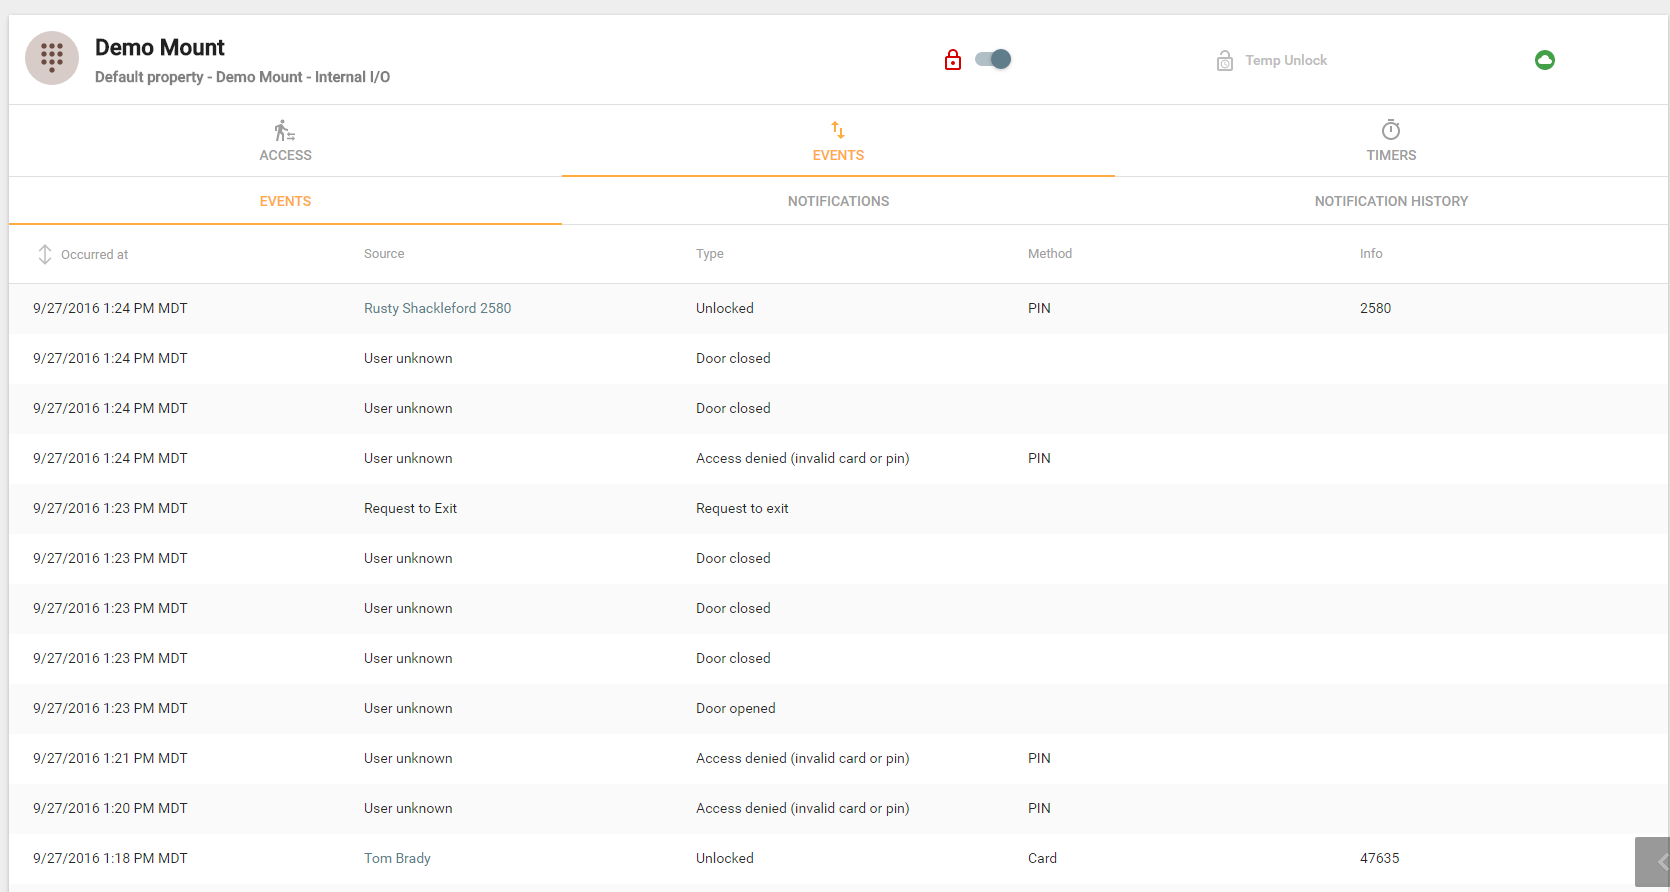
Events
Click the Events tab pictured below to load a report of activity for this door.
Notifications
Click the Notifications tab to load the list of subscribers attached to this door and their associated events. To add a subscription click the Add Subscription button.

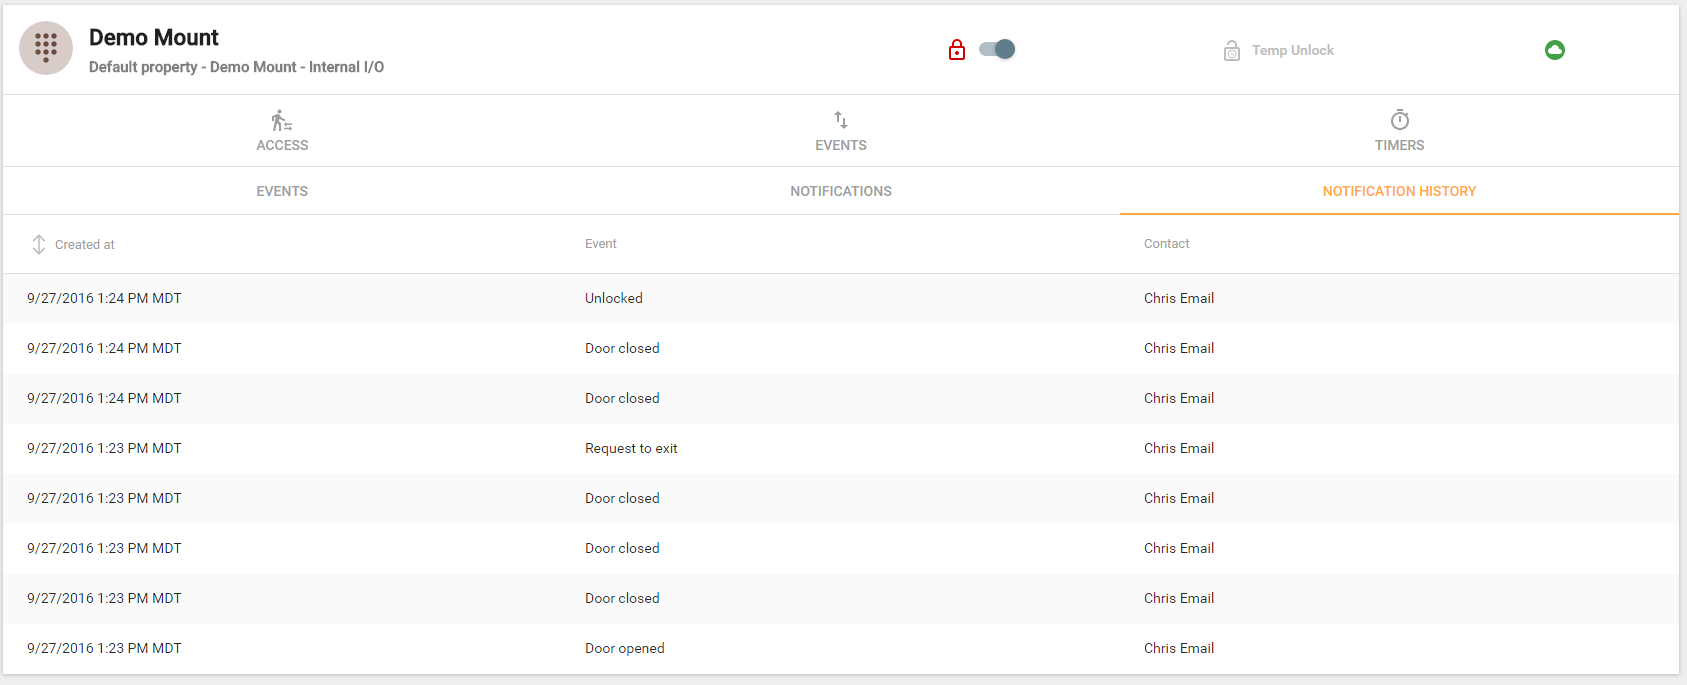
Notifications History
Click the Notifications History tab to load a report of all the email, text, and webhook notifications sent to subscribers.
Timers and Schedules
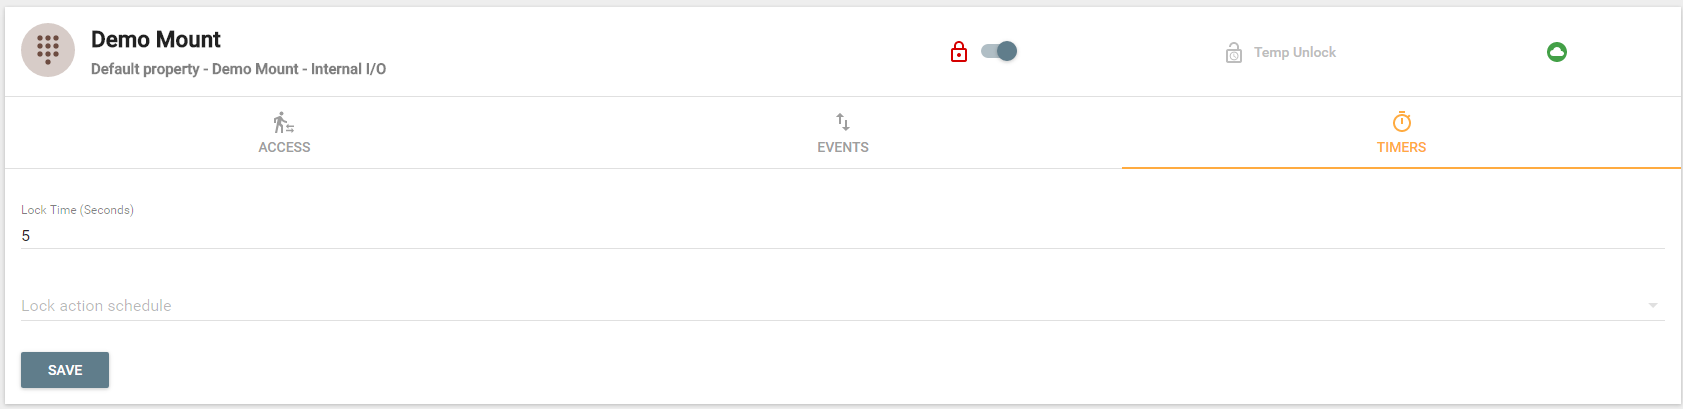
Lock Time
This is the duration for which the selected door will remain unlocked for access events as well as remote unlock and request to exits.
Lock Action Schedule
Lock Action schedules can be used to lock and unlock the selected door on a daily schedule. Click the drop down to select an existing schedule or create a new one.